


1.Locate your site. See To locate a new site for information.
2.Click the Historical Maps toolbar ![]() .
.
3.The Historical map ordering steps will be displayed:

4.Click Set site button ![]() in the Option 2 steps.
in the Option 2 steps.
5.Define the area to be exported by drawing a shape around the required area.
Click a point on the map where you want to start drawing around the area. If you've chosen a particular map feature, such as a building, click slightly away from the boundary line. Move the mouse cursor to the next point and click once more.
Repeat step b) for each point of the shape until the whole of the shape has been drawn except for the last line.
If you make a mistake and want to move back a step, press Backspace on your keyboard. The last segment drawn will be deleted.
Finish the shape by clicking on the first point of the shape.
Note In order for a shape to be used as the historical maps area, please make sure that it does not cross-over itself. |
Once you have finished drawing your shape, Promap will automatically put an historical map frame around the shape you have drawn.
6.Click Get full map pack button ![]() . Promap will open the Historical maps configuration page. More information can be found about the options on this page by clicking the
. Promap will open the Historical maps configuration page. More information can be found about the options on this page by clicking the ![]() next to the available products name.
next to the available products name.
7.Select the products you would like to purchase.
8.Use the radio buttons and tick boxes to select the options that you would like.
9.Once you have chosen your options click either the Add to basket button or the Next button.
10. Promap will now display the Product selection page. This page will display other reports that are available to purchase through Promap. If you would like to order any of these reports in addition to the historical maps, cickthe name of the report or reports you would like to purchase e.g. Enviroscreen, Sitecheck.
11. Repeat steps 8 to 10 until all the products you want are in your basket.
12. At any point, you may review your current selection(s) by clicking the Expand Basket button in the bottom left-hand corner of the page.
13. Once you are happy with your selections, click the Next button.
14. The Delivery details page will now appear.
15. In the boxes there will be the last entered delivery details. These can be edited by entering the address of where you would like the report to be delivered. At this point you can also set your email to be the default email address that appears.
16. The mandatory fields that are required to complete your order are outlined in blue and marked with an asterisk. You will need to complete all of these to continue. Please be extra careful when entering your email address as this is used for report delivery.
Note: It is mandatory that you enter Your reference number, and you may also need to enter a Purchase order reference as this field is mandatory for some companies. For an Enviroscreen report you will also be given a text box to enter in the name of the client on whose behalf you are purchasing the report, this is not a mandatory field.
17. Once you have finished click the next button in the bottom right-hand corner of the screen. You should now see the Order summary page.
18. The Order summary page displays all the products that you have selected. You can check the options you chose for each item by clicking the ![]() sign that is to the left of each item. This will expand a list of all the options you selected.
sign that is to the left of each item. This will expand a list of all the options you selected.
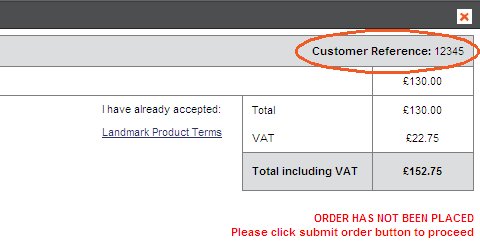
19. The references you entered for this order appear at the top of the page for you to check:
20. We display the site address and delivery details along with the price without VAT, the VAT and total price including VAT. To view the delivery details click on the Delivery details link, and the address that you have entered will open in a new window. At this stage you can still edit the site address. This will only change the text, and does not affect the site that you have chosen, which will remain unchanged. To edit the address, click on the edit link next to the site address.
21. You can print this summary in its expanded form for reference or view it as a PDF by clicking on the buttons provided.
22. Click the submit order button in the bottom right-hand corner of the screen. A warning will appear to check that you are happy with the cost, if you are, click the OK button. The Order confirmation page will now appear.
23. The order confirmation page confirms the order that you have placed. The following information is displayed on this page:
•Order details including the cost
•The site address
•A link to view the delivery address
•Order tracking page link, purchase order reference and customer reference entered during the order process. See Order Tracking for more details on how to track your order.
24. A copy of the order confirmation page can be displayed as a PDF file or printed for your reference by using the buttons provided.
25. The PDF will open up in a new browser window. To save the file click the Save a copy button in the top right-hand corner of the screen.
Clicking the Back to Promap button at the bottom of the screen will return you to Promap.
See also