


| Expand All Collapse All |
1. Locate your site in Promap. See Choosing how to locate your site for details.
2.Click the Export Data toolbar.
![]()
3. Before you export the mapping data you need to define the area you would like to export. There are three methods that can be used to define the export area: by shape, custom or export area frame. Some of the export options such as Aerial Photos and DSM/DTM Data will only be available as rectangles.
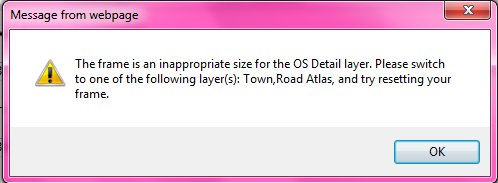
Please note, that there are size restrictions in place on some of the map layers, this is to ensure that the export frame you define can be seen. If you set an export frame that is too large for the map layer you are currently viewing Promap will either recommend you switch to an alternative map layer or in the case of exports larger than 200KM2 it will ask you to complete a Large area data quote form see Large Scale Exports:
Choose one of the options below:
- either -
i.Click the Set Export Frame button.
ii.A frame will appear on your screen. To resize it, click it to select it and then click and drag the sizing handles. As you resize the frame the cost of the data export will be adjusted and displayed at the top of the frame. iii.To move it, click and drag its centre. iv.Now go to step 4 below. |
- or -
i.Click the Set Custom Export Frame button.
ii.A Set Custom Export Frame dialog box will appear and you will now be presented with three different options •Rectangle Export (Using Centre Point) - this option will require you to enter the Easting and Northing co-ordinates, in metres, for the centre of the area you are interested in. Then you will be required to enter the width and height, in metres, of the rectangle you wish to create. Click on Create. See To obtain an Easting and Northing for a point on the map.
•Rectangle Export - this option will require you to enter the Easting and Northing co-ordinates, in metres, for the top-left and bottom-right corners of your required rectangle. Click on Create. See To obtain an Easting and Northing for a point on the map.
•Circle Export - this option will require you to enter the Easting and Northing co-ordinates, in metres, for the centre of your circle and then set the radius you require around it. Click on Create. See To obtain an Easting and Northing for a point on the map.
•Shape Export - this option will require you to upload a SHP file as a zip file, or a DXF file to define your site area.
iii.Now go to step 4 below. |
- or -
i.Click the Set Shape Export Frame button.
ii.Define the area to be exported by drawing a shape around the required area. Click a point on the map where you want to start drawing around the area. If you've chosen a particular map feature, such as a building, click slightly away from the boundary line. Move the mouse cursor to the next point and click once more. Repeat step b) for each point of the shape until the whole of the shape has been drawn except for the last line. If you make a mistake and want to move back a step, press Backspace on your keyboard. The last segment drawn will be deleted. Finish the shape by clicking on the first point of the shape.
iii.Once you have finished drawing your shape, Promap will automatically put an export frame around the shape you have drawn. The cost of the export will appear at the top of the frame. iv.Now go to step 4 below. |
4.Click the Fix Export frame button.
![]()
Note Once the frame is fixed, the Fix Export Frame button changes to Unfix Export Frame. |
See also