


You may sometimes only know the general area where your site is. For example: You're looking for a farm North of Oxford. In that case you can locate the town on the Road or Town layer and then move around the map to find the general area of where the site is. Next you switch to a more detailed map layer such as VML Raster to find the exact location of your site. Finally, you switch to the Detail layer and centre your map on the site.
1.Click the Address Search button ![]() on the standard toolbar.
on the standard toolbar.
2.If you already had a map loaded you will be prompted to save that map before another is loaded. We recommend that you save any loaded map before locating another.
The Locate by dialog box will appear:
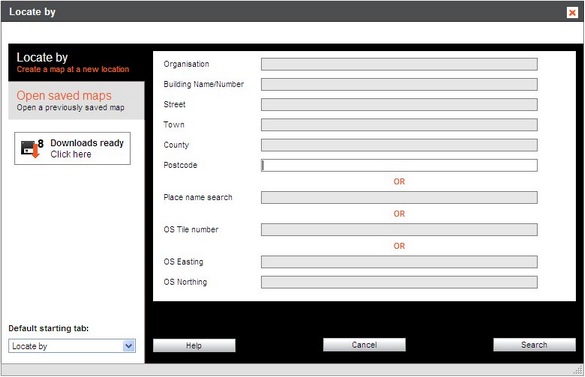
Note The Locate by dialog box also contains an Open saved maps tab to allow you to search through your previously saved maps. You can select which tab is automatically displayed by default by clicking on the Default starting tab drop down menu in the bottom left hand corner of this window. If you have any new downloads available you will also be notified on this window. |
3.Enter the name of the town nearest to your site in the Town text box.
4.Click Search.
If there are several towns to choose from, the Locate by - Results dialog box will appear.
5.Click the town you want.
The Locate by - Confirmation dialog box will show you the matched address at the top.
6.Select the map layer where you want to start your search for the site.
If you're not sure of your site's address, you might want to start on the Road layer.
If you're searching for a site to develop, you might want to start on the Street layer.
7.Select the other options you want and click Go to map.
See To select a map layer and marker style for further information on the options here.
(If you're searching for a site to develop go to step 2 of To search for sites to develop)
8.Now move around your map until you find a closer match to your site.
See To move around the map for tips on how to do this.
9.Right-click the site area to centre it on your map.
10. Move to the next more detailed map layer.
11. Repeat steps 8 to 10 until you get to the VML Raster map.
12. If you're sure that you've located the right site, click the Detail map button.
13.The Enter Expenditure Details popup box will appear to warn you that you are about to do a chargeable action. Enter a Project and Reference for your map view and this will be entered into your accounting files. For more information on expenditure details go to Enter Expenditure Details.
Your Detail map will then appear.
If you now find that you have made a mistake, you could use your free roaming allowance to search for the site you do want. However, you do not need to search for your site on your Detail layer map. Although you have a certain amount of free roaming, you will soon be charged if you move too far away from the site. See Distances you can roam for free.
So if you think your site is a good distance away and it will be cheaper to choose a new Detail map, continue on to step 14 below.
14. Save your Detail map first by clicking the Save button ![]() on the standard toolbar. See To save a file for the first time for details.
on the standard toolbar. See To save a file for the first time for details.
15. Go back to the VML Raster map and search for your site.
16. When you've found it, centre it on the map by right-clicking it and click the Relocate button ![]() in the Display Controls Bar in the top left-hand corner of the screen.
in the Display Controls Bar in the top left-hand corner of the screen.
The Relocate dialog box appears.
17. Select the Detail map layer and click Create.
18. Click OK on the Enter Expenditure Details popup box that will appear.
Your Detail map will open centred on the new location you found in step 16.
You will be charged for viewing this new detail map.
See also
To search for sites to develop
Choosing how to locate your map