This article overview the process for how to create a PDF or Image of a map in Promap.
Step 1) Select the Print Task in the left hand menu.
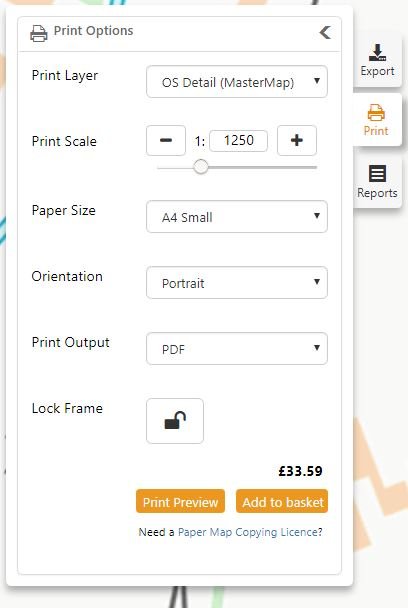
Selecting the Print Tab will display all the relevant options for changing the print scale, the paper size, the orientation and the output. Please select PDF for accurate to scale maps for planning applications or Image for JPEGs or PNGs that could dropped directly into a valuation report.
Also, selecting Print will ensure the full range of Draw and Measure tools are available.
With the Print task active, the grey rectangle will display the area that will be printed as your order.
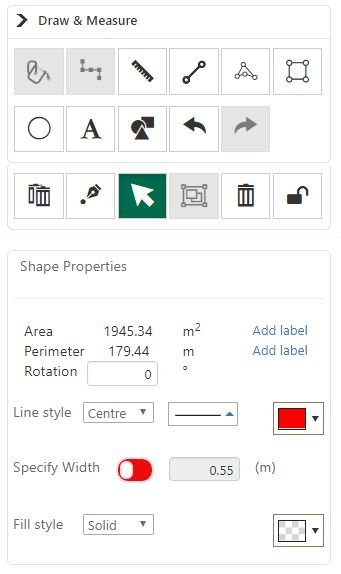
Step 2) Use the ‘Draw’ tab on the right hand side to annotate your site.
The tools to draw an outline around a building or add text are available in the Draw and Measure tab. Within this tab you will find the following tools:
- Fill tool – this will fill a MasterMap feature. Please be aware that this tool is only available on the MasterMap layer.
- Snap to Point – this tool can be used in conjunction with the other drawing tools to accurately snap drawn points to features on the map. Please be aware that this tool is only available on the MasterMap layer.
- Measure tool – this tool can be used to measure linear distances
- Line tool – this tool can be used to create lines.
- Shape tool – this tool can be used to create polygons on the map.
- Rectangle tool – this tool can be used to create squares or rectangles.
- Circle tool – this tool can be used to create circles.
- Text box tool – this tool can be used to create text boxes on a map, once drawn you are able to change text within the ‘Shape Properties’
- Shapes tool – this tool provides access to Promap Custom Shapes (previously the symbols tool), as well as access to your on Drawing Libraries.
- Undo/Redo tools – these tools will revert recent changes either forwards or backwards. Control + Z and Control + Y are the shortcuts for these tools.
- Delete all – this tool will remove all drawings from your screen.
- Add/Remove – this tool can be used to edit existing shapes or polygons on the map.
- Merge tool – this tool can be used to combine overlapping or adjacent polygons.
- Delete tool – this tool removes the current active shape on the map.
- Lock / Unlock – these tools will lock or unlock a shape on the map, locked shapes cannot be moved.
Step 3) Updating your shapes or annotations
To change the colour or specify the size of shapes drawn on the screen, the Shape Properties window can be used. To change the Line or Fill colour of an object, click the rectangle containing a colour, the transparency can also be updated from within this window.
You can also add labels for area and perimeter, these will be displayed as text boxes on the map.
Step 4) Check your Print or Add a Header & Footer
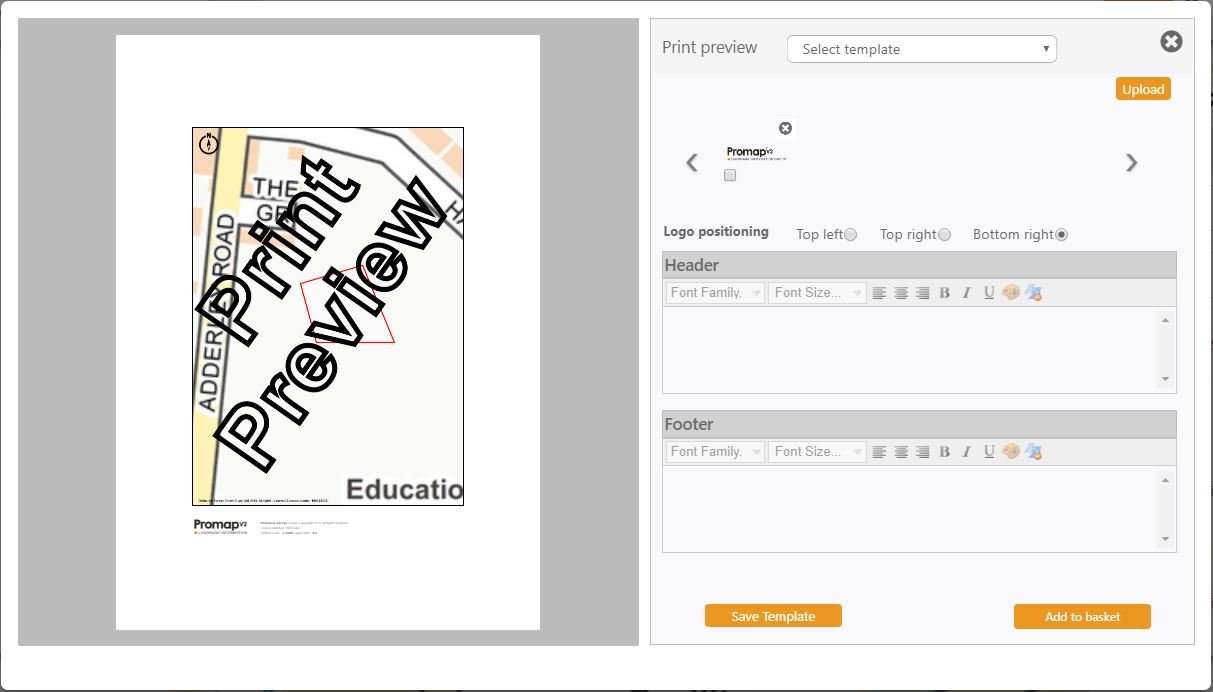
Use the Print Preview button to check a print prior to purchase. A logo can be uploaded and then the location selected. The Header and Footer windows allow you to update text above and below your map.
Saving a template will ensure that you are able to use standard logo locations, header and footer text.
Step 5) Add to basket and complete order.
When you have added an order to the basket, click the View Basket button or the basket icon in the top right hand corner to continue your order. You will be asked to add a Project ref and PO Number prior to purchase, also if you have chosen to Image over PDF, you can choose between JPEG and PNG format here.
Click Submit Order to complete your purchase.
Step 6) Saving and Order History
You will be prompted to save you order following your purchase, if you have ordered multiple sites from a single basket you will be prompted to save each of these in turn. Locate to the appropriate file using the folder structure, add a Name and Reference and click Save.
Once your order is complete and saved you will be directed to the Order History, from here you are able to download your order.